Microsoft always has APIs & SDKs for their systems that are easily usable in .NET languages.
Accessing such Microsoft based systems from Node.js applications, especially those not hosted on a Microsoft Windows platform, may be trickier.
I know you might object, saying there are usually web services published along with the APIs & SDKs, but hand on heart, are you ready to use them in a fast and efficient way right away? I bet you are expecting some learning curve delay.
Wouldn’t it be easier if an integration platform allowed you to create, retrieve, update, and delete data in major business systems via the execution of simple SQL statements? At first, that might sound dangerous – wouldn’t those CRUD operations threaten the data integrity?
The fact is this possibility exists – by using the Connect Bridge platform, which I will be using in this tutorial from Connecting Software. It is a commercial tool, but you can access its trial version for free. Why don’t you give it a try?
Getting Started
Request your Connect Bridge trial, download and activate your license by following this tutorial video.
We will also need a machine with installed Node.js. We will demonstrate on a Linux machine running CentOS 7.x distribution.
Prepare the Environment
I’ll presume you have picked your favorite Linux distribution. The first step is to install Node.js in your environment. On CentOS, I have used my favorite package manager, Yum. If you are not sure how to install Node.js in your OS, please consult the node.js deployment guides page.
You will now need to get connected to your target system, for example, Microsoft Exchange. For this, run Connect Bridge Management Studio and
- Add an account for Exchange (Accounts - Add account). For adding the account, you should select the connector Microsoft Exchange and use your Exchange login credentials
- Open the New Query option and then the Connection Browser. Find the Exchange Connector and expand it until you see the DefaultConnection. Right-click the DefaultConnection and choose Get Connection string. Copy the ODBC connection string, as you will need it to pass it on to the script.
- Use the New Query option to test out a query that will access what you need in Exchange. Please note that although it looks as if we are using a database directly, that is not the case. Connect Bridge is accessing the API and then presenting it as if it were a database. Once you have your query, copy it, as you will need to pass it on to the script.
The solution
Update: The Connect Bridge Playground service mentioned below is no longer available. This article will soon be updated accordingly.
In the meantime, if you want to use Connect Bridge for your Node.js integration projects, do not hesitate to leave a comment below or get directly in touch with our experts.
The prodedure for this solution is as follows:
- Create a folder for the solution. I have named it ‘nodearticle’ because of obvious reasons.
- Create a manifest file for the nodejs application. The file name is package.json. Find the content of the file below.
{
  "name": "nodejsExchangeDemo",
  "version": "0.0.1",
  "description": "a demonstration of accessing exchnage calendar in nodejs",
  "main": "app.js",
  "author": {
    "name": "",
    "email": ""
  },
  "dependencies": {
  }
}
3. For this action we need the machine to be connected to internet. Open your favourite shell. And execute the following command to install a dependency module for our application called connect-bridge-node.
npm install connect-bridge-node -save
After this action the connect-bridge-node dependency should appear in our package.json manifest file.
4. In the next step we will exploit a little bit the module connect-bridge-node (written by me) source code itself. We will copy the file test.js from the github repository of the module. and modify it so it looks like this (we will explain the code in the code comments itself):
//require the module dependency and pass your connection parameters
//to obtain your connect-bridge-node credentials please follow
//the chapter on 'How do I find out my credentials?' in
//this article
var cbnode = require('connect-bridge-node')('pg.connecting-software.com', 4433, 'michalhainc0036',
					 '29e)5d2bc9044e2c42878A4A63BC6777', 'EX2010_PLAYGROUND_michalhainc0036');

//error handler for connect bridge operations
function onError(err) {
    console.error(err);
}

//connected event handler - executed when successfully connected
//to a Connect Bridge integration
//server instance
function onConnected() {
    console.log('Connected to Connect Bridge');
    console.log('Inserting record to Exchange Calendar...');
    //after successfull connection we will
	//create one appointment and call the onRecordInserted
	//callback afterwards
    cbnode.execute("INSERT INTO [Appointment] (Subject, StartDate, EndDate, Location) "+
				   "VALUES (?, ?, ?, ?); ",
				   //parameters for the insert statement
				   ['my appointment', '2015-10-11 10:00', '2015-10-11 10:00', 'Bratislava' ],
				   onRecordInserted, onError);
}

function onRecordInserted() {
    //first 100 appointments from the Exchange calendar
    //from our CB playground account
    //we will retrieve only certain field
    console.log("Retrieving first 100 appointments from Exchange calendar...")
    cbnode.execute( "SELECT TOP 100 Subject, Location, StartDate, EndDate "+
					"FROM [Appointment];",
					//empty params array
					[], onRecordsRetrieved, onError);
}

//disconnected event handler - executed when successfully disconnected
//from a Connect Bridge integration
//server instance
function onDisconnected() {
    console.log('Disconnected');
}

//records received event handler - executed when data records are
//received from Connect Bridge for a previously executed SQL statement
function onRecordsRetrieved(result)
{
    console.log(result);
    cbnode.disconnect(onDisconnected, onError);
}

//begin connecting to the Connect Bridge integration server
cbnode.connect(onConnected, onError);
5. Run your app.js via command line using the following command
node app.js
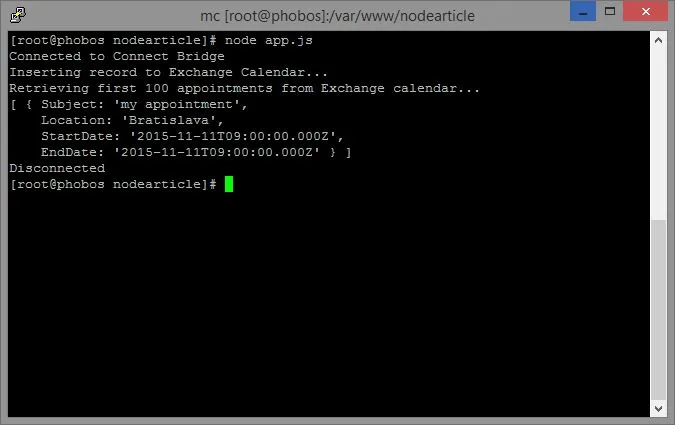
6. The app.js script will insert one appointment into your CB Playground Exchange calendar. And retrieves first 100 appointments from your calendar afterwards.
7. You should see the following output if everything went ok:
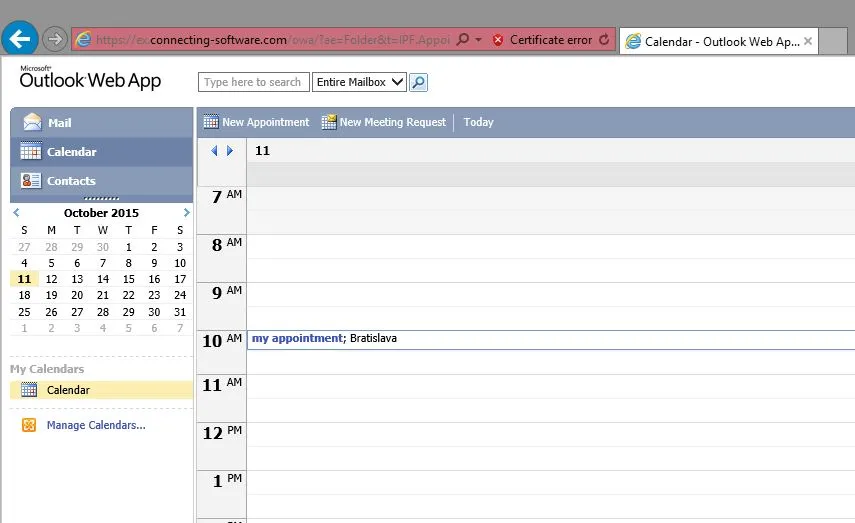
8. And voi-la, there should be your appointment shown in the Outlook Web Access of the CB Playground Exchange server:
How do I find out my credentials?
Here is a brief walkthrough to find out your credentials:
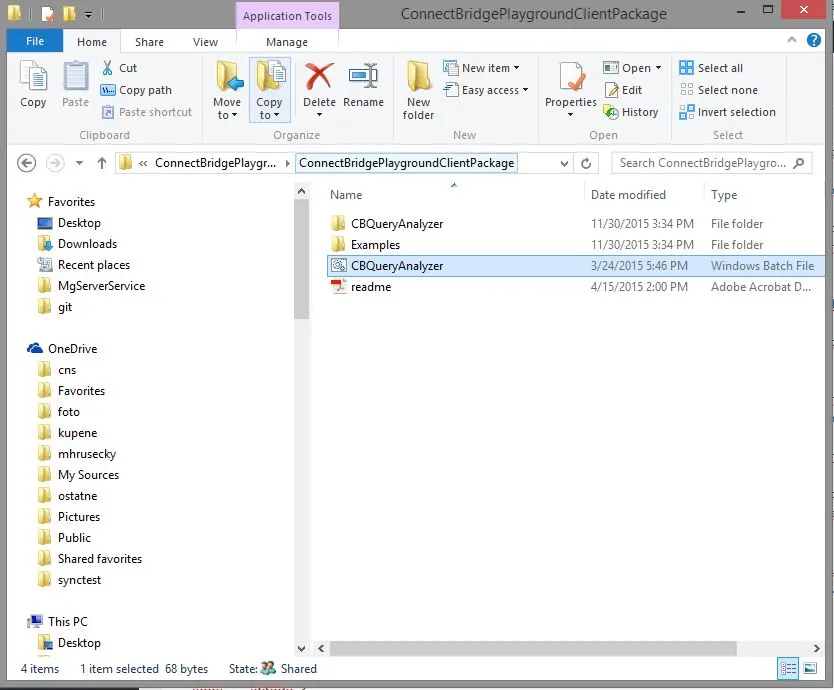
Download the Connect Bridge Playground Client Package (you have a hyperlink pointing at it in your registration email). If you do not have a free playground account yet, please feel free to register.
Extract the contents of the package and find the CBQueryAnalyzer.bat file and run it
The Query Analyzer application will ask you about registering an ODBC driver, (needed just for the app, not for your app.js node project).
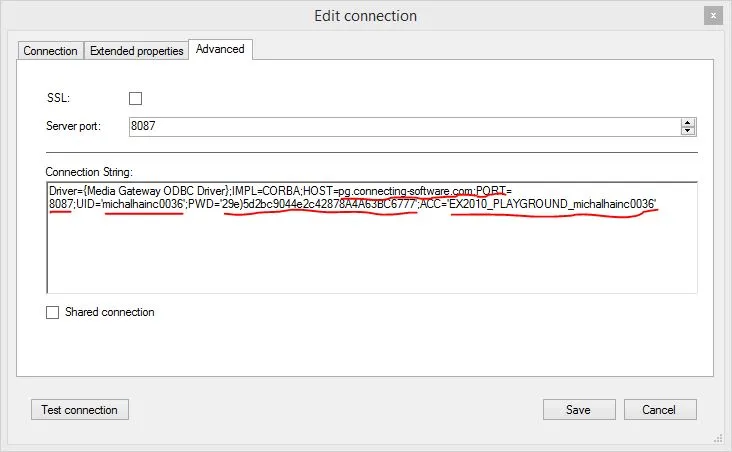
Right click the EX2010 connection in the left hand connection panel. Pick ‘Edit connection’

Go to the ‘Advanced’ tab and copy the underlined credentials to your app.js script except of the port parameter that should be in our case 4433.